Showing posts with label Party Food. Show all posts

Thursday, 12 February 2015

Sliders

It has been hot here the last few days.  Hot and humid.  I really hate the humidity, and it makes me quite grumpy.  This makes coming up with fab dinner ideas nearly impossible.  I recently had a birthday, a big enough number not to disclose here, and got a great cookbook for my Thermie called Quirky Cooking by Jo Whitton.  She had a heap of dietary issues and has made up the best recipes to compensate.  I decided to try her Spelt Bread.  Miss A has never tried spelt, but I thought it was worth a go.

I made up the dough and it rose beautifully!  Like no GF dough as ever risen!  I was so excited!  I split into 12 small dinner rolls and baked.  The smell of baking bread that isn't GF is divine!  I had nearly forgotten the joy of kneading dough and stretching and moulding of elastic wheat dough.  It was a heavenly experience.


I had some meatballs in the freezer, pork and vegetable from Ottoway Pork, that flatten into beautiful little mini hamburger patties.  These went beautifully with our rolls to make yummy little sliders.  In case you haven't been bitten with the 'slider bug', a slider is two or three tiny hamburgers served in many restaurants at the moment.  I am not quite sure of the point, a normal size hamburger hits the spot the same, but these things seem to be everywhere.  They worked well for tonight as my kids only manage one of them.  Spelt rolls are much more filling than their GF counterparts.

Unfortunately, Miss A has had a gut reaction to these.  Within an hour of comsumption, her gut was swollen and hard.  I hope this is a small reaction so we can consider introducing again in a month's time, but if not, it was worth the try.  Any possibility of expanding her diet is worth the risk.

I will share the recipe anyway, you may be able to tolerate it where she cannot.  Just be aware that spelt is a type of wheat, and does contain gluten.  It is a more ancient form and can be more easily digested for a percentage of the population, but not for everyone.

SPELT BREAD ROLLS
Ingredients
100g brown rice
400g white spelt flour
2 tsp dried instant yeast
1 1/2 tsp salt
40g olive oil
1 egg
230g water, room temperature

Method
Place brown rice into Thermomix mixing bowl and mill 1 min/ speed 9.

Add all remaining ingredients and mix 6 sec/speed 6.  Then knead 2 min/knead function.

Transfer dough to Thermomat and let rise until doubled in size, approx 30 mins.

Roll into 12 balls and place together on a tray lined with baking paper.  Bake 30 mins, 200C.

Non-Thermomix Option
Use brown rice flour instead of brown rice.  Mix and until smooth in a mixing bowl, knead until smooth on a pastry sheet or floured surface.  To rise, place in an oiled bowl in a cold oven on the middle rack.  Fill a roasting pan with boiling water and place on bottom of oven.  Shut door to keep in all the steam.  Allow to dough to rise for 30 mins.  Remove roasting pan before baking.


To turn into these cute sliders, I added butter (because it is yummy!), cheese, nomato sauce (recipe here) and lettuce.  For Mstr H's to be dairy free, I used Nuttelex and soy cheese on his slider.


Monday, 26 January 2015

Australia Day!

Well, it has been over a year since I posted on my blog.  A lot has happened this year that has made it difficult for me to find the time.  I suffered from exceptionally poor health, we struggled with Miss A's health as well, and she had two anaphylactic episodes.  We also found that she can go anaphylactic from the smell or touch of nut products, but does have time to use an epipen and get to hospital so that is good.  Master H has developed a lactose intolerance as well, so food has been fun.

Good news, I got a Thermomix!  Yay!  For those that don't know what that is, it is an all in one kitchen machine.  It makes cooking so much easier as you can mill your own seeds or grains into flour, crush anything from ice to fruit, knead dough, steam and boil, whip, make ice cream, so much!  I use it all the time.

My inspiration for blogging today is the beautiful Australia Day.  In true Australian form, we had a BBQ.  As the dairy free inclusion in our diet is only 3 days old, I was struggling to come up with an allergy free menu, that would satisfy our guests who eat 'normal' food.  What a challenge!  For starters, all the sausages I saw in the shop had onion and garlic in them so were not suitable.  I eventually found some British Pork sausages which did not have them in, but was thinking we would have to have a BBQ without the snags.  Sacrilege!

Here is what I came up with for a menu:
Hamburgers (recipe previously posted)
Coleslaw
Potato and Mustard Salad
Potato chips
Quinoa crumbed chicken
Green salad
Pork sausages (British Pork from Ottoway Pork)
Pork patties (Ottoway Pork)
Oriental Rice Salad
Gluten and dairy free cheesecake
fruit platter
meringue nests (Coles)
assorted hamburger rolls, both normal and wheat free
Orange-ade

The day went by so fast I did not get a chance to take any pics, but will add some at a later date if I make again.

First, the coleslaw.  This is a recipe from the Thermomix Community by daniellehcp.  Here is the link:  www.recipecommunity.com.au/side-dishes-recipes/coleslaw/117912

I made my own mayonnaise, in the Thermie of course!  It was super easy and really yummy.  The beauty of making my own is that I know exactly what is in it and can cater to our personal tastes.  The mayonnaise recipe is out of the Thermomix Basic Cook Book.  I just used vegetable oil.

MAYONNAISE

Ingredients
250g Grapeseed or Safflower Oil
1 Egg, room temperature
1 tsp lemon juice or vinegar
1-2 tsp prepared mustard (optional)
2 pinches ground black pepper (optional)
1/2 tsp salt

Method
Place a jug onto the mixing bowl lid, weigh oil into jug and set aside.

Place egg, lemon juice or vinegar, mustard (if using), pepper (if using) and salt into mixing bowl.  Mix 1 min 30 sec/ Speed 4 while very slowly pouring reserved oil onto upturned measuring cup, letting it drizzle into mixing bowl to emulsify.  Transfer mayonnaise into bowl and serve immediately or transfer into an airtight jar and store in refrigerator.

Non Thermomix Method
Place egg, lemon juice or vinegar, mustard (if using), pepper (if using) and salt into a blender or kitchen whiz.  Mix slowly, as you drizzle oil through hole in lid to emulsify.

This Mayonnaise is not strong flavoured, so if you want more of a 'kick' you could probably add some lime juice or extra acid, and some spices.  If you are adding to salads with other flavours, it is perfect as it is!

Next I made the potato and mustard salad.  This is a quick, delicious salad that my cousin made.  Thanks Nicole!  It is easy, yummy and looks impressive.

POTATO AND MUSTARD SALAD

Ingredients
6 potatoes, peeled
4 eggs, hard boiled and peeled
2 tbsp wholegrain mustard
2 tbsp mayonnaise

Method
Dice potatoes and boil until soft, drain and transfer to a large bowl.  Add mustard and mayonnaise while still hot and stir to combine.  Cut eggs into quarters, and add to the salad.  Mix softly to not break the eggs.  Chill or serve while still warm.

As some of the people at the BBQ dislike mayonnaise and mustard, I also cut potatoes into thin slices to BBQ so there was a plain option too.

I will also give you the recipe for the cheesecake.  If you don't have a Thermomix, you should still be able to do this by hand.  Just use your muscles to mix in the cream cheese nice and smooth, but a kitchen whiz could probably do it as well.

This is a recipe from the Recipe Community, but it is for a normal cheesecake.  I will retype the recipe as I made a few changes to it.  The original recipe was by shelleyjkemp.

NO BAKE STRAWBERRY CHEESECAKE

Ingredients
Base
150g Orgran Shortbread Hearts
50g Gluten Free Weet-Bix
50g Nuttelex

Filling
500g soy cream cheese
400g coconut condensed milk
juice of 1 lemon
1 tbsp gelatine
1/4 cup boiling water
250g strawberries, chopped

Coconut Condensed Milk
1L Coconut Milk
200g Rice Malt Syrup

Method
Place the Coconut Milk and Rice Malt Syrup into the jug of your Thermomix (or onto the stove, but I do not have times for this).  Cook 90 mins/100deg C, Speed 4.  Transfer the Condensed Milk to a bowl to chill.

Clean and dry your jug.  Add biscuits to your TM bowl and crush for 5 secs, Speed 7.  Set aside.

Add Nuttelex to bowl and melt for 3 mins, 60 deg, Speed 1.  Add reserved crumbs and mix 3 secs, Speed 4.

Press into a lined 20cm Springform tin.

In a dry clean TM bowl, add the soy cream cheese and beat for 10 secs, Speed 5.  Add Condensed Milk and lemon juice and beat for 10 secs, Speed 5.  Mix gelatine with boiling water and add with chopped strawberries to TM bowl, mixing for 3-5 secs/Reverse/Speed 4.  Pour onto base.

Chill for at least 3 hours.

Serve with whipped cream or coconut yoghurt for dairy free.

Everyone loved the food, which left me with a sense of pride.  It took me a week to come up with the menu, with near insurmountable allergies, intolerance and fussiness to deal with, and I came out the other side with success.  It helps with all those times I fail, which when you have to change recipes so much does happen, often!

Let me know if you have any successes or failures.  It happens to all of us!


Wednesday, 4 December 2013

Party Share Plates


Miss A's class was having a shared recess today.  This is where all the Receptions and Year 1s take in a plate of food to share.  Obviously these sorts of situations can be stressful with dietary issues, and there is no real right way to tackle them.  Because of the stress that can be felt, I thought I would share with you what I do to give you ideas for tackling your own challenges.

Firstly, I like to take a selection of food so that if there is nothing else she can eat, Miss A has some variety to choose from.  Given all the yummy-looking food that will be there, it also needs to be presented nicely.  She misses out on so much, the last thing she needs is to share an ugly plate of food.  I also try to make the plate healthy-ish, but palatable so she doesn't feel unsatisfied.

For this recess, I decided to make watermelon trees, choc dipped strawberries and some gluten free chocolate muffins.  I cheated and used the Orgran Chocolate Muffin mix.  Usually for this mix I add a grated zucchini, it makes it really moist and yummy with the hidden veg to add nutrition, but from past mistakes I have realised that these things are an aquired taste born from necessity.  None of Miss A's friends appreciate this sort of effort so her food ends up being passed over by the other children as 'yukky' or 'strange'.  Instead I made as per the packet instructions and used a delicious chocolate butter frosting to top.  The recipe for the frosting I got from google, but cannot remember the page.  Feel free to let me know if it is your recipe and I will give credit.

It is 1 cup butter and 1/2 cup cocoa, whipped until smooth.  Add 5 cups pure icing sugar and 1 tsp vanilla essence and continue beating.  Gradually add small amounts of milk until the desired consistency is reached.  I made this as a soft frosting to be extra gooey and yummy for little people.  If you have never choc dipped a strawberry, just melt some choc melts (I used dark, but white or milk work too), and dip the strawberries in, leaving the green leaves at the top.  Place onto some baking paper on a tray and put in the fridge to harden.  The chocolate will not stick to the baking paper so this works perfectly.

You don't need to do a sweet platter, nice savoury platters are easily achieved with your favourite quiche slice recipe, popcorn and veg cut into sticks, or popcorn, cheese and ham sticks and gluten free jaffas makes a lovely supper.  Lots of ideas to get creative with.  With important thing is variety and presentation.  This is what makes it bearable for little people who can't eat off of anyone else's plate.

Let me know your ideas in the comments.

Strawberry Shortcake


It was my dad's birthday a while back, and when thinking of the birthday cake, which I obviously offered to prepare, I drew a blank.  You can only make mudcake so many times.  We are all getting sick of it.  I remembered seeing a recipe in the ones my mum got from the library for Strawberry Shortcake (which was a red headed doll in my day!) and thought I would give it a go.

Being a sponge-type cake I was dubious.  The gluten free ones I have tried in the past have a nasty after taste and are just 'not quite right' in the consistency/texture feel.  They have always been a big disappointment.

I tried this one, and although it is still a different consistency to a normal sponge, it works with the cream and strawberries.  Looks pretty nice too, if I do say so myself.  The recipe comes from Lola, so here goes.

STRAWBERRY SHORTCAKE
INGREDIENTS
100g castor sugar
2 tsp butter
1 tbsp glycerine (edible - from supermarkets and cake decorating shops)
4 tbsp hot water
100g gluten free plain flour
2 tsp gluten free baking powder
2 tsp vanilla essence

Filling:
1 punnet strawberries
250 ml cream
2 tbsp pure icing sugar
few drops vanilla essence

METHOD
Preheat the oven to 180C.  Grease sides and line the bottom of 2x20cm round cake tins.

Place the eggs and sugar in a large metal or glass bowl and hand whisk over a saucepan of hot water until the mixture is slightly warm and frothy.  Remove from the heat and continue beating with an electric beater until the mixture is thick and creamy, but not stiff.  In a separate bowl, add the glycerine and butter to the hot water and let stand for 1 minute.  Fold the flour and baking powder into the egg mixture.  Mix in the vanilla and glycerine mixture.  Fold lightly but thoroughly.  Pour into prepared tins and bake for 30 mins.  Let stand for at least 1 minute before turning onto a wire rack to cool.

Beat cream until thickened and add the icing sugar and vanilla.  Continue beating until stiff.  Reserve strawberries for decoration, and thinly slice the rest.

Place down your base cake (the least pretty of your two cakes) and spread thickly with cream.  Top with a layer of strawberries.  Place the other cake on top.  Pipe swirls of cream on to the top and decorate with strawberries.  To fan you slice thinly, but not all the way through.  Fan with fingers.  When decorated, sprinkle the entire cake with icing sugar to serve.

Yummo!  A great cake to take to someone's house or to share with a cuppa!  Let me know what you think in the comments.

Tuesday, 26 November 2013

BBQ Season

Here we are, at the end of Spring and BBQ's are being fired up in every backyard.  This presents its own problems for those who are have allergies and intolerances.  Even with the beautiful array of lean meats and veg to put on the grill, most people go for prepackaged sausages and patties that contain all of the foods that we or our loved ones can't eat.  Most contain onion and garlic, a banned food for Fructose Malabsorption, and/or gluten for coeliacs or those intolerant or allergic to wheat or gluten.  The other issue is salad dressings or the chosen vegetables in the salad.

Tonight, being the tail end of a 35C day in Adelaide, we have guests coming over for a BBQ dinner, so as I was pressing my burgers and marinading my eggplant I thought I would share the recipes with you.  I am not as organised as I would normally be, as Miss A had to stay home today.  It appears she has caught Mstr H's virus from last week.  She is itchy, spotty (eczema) and running a temperature periodically.  Argh!  I had hoped to have a sick-day-free school term for her, but we are now up to 4 days off.  Oh well.  With vague symptoms like this, Miss A usually has a swollen, hard, sore tummy, and this is no exception.  She is also inflamed 'down below', leading to redness and pain.  All due to her digestive issues.

Back to my yummy food!  I have previously given you my hamburger recipe, so here is one for chicken burgers!

CHICKEN BURGERS
INGREDIENTS
500g chicken mince
1/2 cup nomato sauce
1 carrot (grated)
1 tbsp tamari soy sauce
1 tsp paprika
herbs and spices to taste

METHOD
Mix all the ingredients together well.  Separate mix into 8 equal portions.  Using your hands, shape each portion into a round, hamburger shape.  Grill carefully on a BBQ or in a frypan.  Remember that these burgers are fragile, so may break apart if you are not careful when flipping.  Serve with veg or in a gluten free roll of your choice.


The best accompaniment for these is corn on the cob with butter, marinated eggplant and stuffed field mushrooms.  Here are the recipes for the eggplant and mushrooms.

MARINATED EGGPLANT
INGREDIENTS
2 eggplants
1/2 cup Balsamic vinegar
1/4 cup olive oil
2 tbsp tamari soy sauce
herbs and spices to taste

METHOD
Slice the eggplant fairly thinly, each slice should be about 2 mm thick.  Place rounds overlapping in a large seal-able container.  Mix the remaining ingredients thoroughly.  Pour evenly over the top layer of eggplant and seal the lid.  Shake the container to distribute the marinade evenly.  Sit for at least 30 mins.  BBQ and serve.


STUFFED FIELD MUSHROOMS
INGREDIENTS
Field mushrooms or any large mushroom
1 pkt spreadable cream cheese
chives
diced bacon
black pepper

METHOD
Mix together the cheese, chives, bacon and pepper.  Carefully remove the stem from the mushrooms.  Fill the hole with the cheese mixture.  BBQ until cooked.  Yummo!

I hope you enjoy!  Leave your thoughts in the comments.

Thursday, 14 November 2013

Chocolate Gelato

Wow, we have had such a busy week!  Mstr H has been sick all week with a nasty virus.  I hate those vague viruses!  He is really lethargic, has a nasty cough and occasionally asthma.  Such a pain.  This has led to a lot of 'stay at home' time, but very little time to actually achieve anything.  We have also been getting together some donations to help the people in Ormoc in the Philippines after a typhoon wiped out the entire area.  So sad and so many people affected.

With all of this happening, we have been using the BBQ a lot for dinner.  I just get the meat out, cook the veg and hubby takes care of the rest!  We are even planning a BBQ Christmas this year.  Who needs a big roast, when we have prawn kebabs, salmon fillets and marinaded lamb chops instead?  Also taste testing a recipe to make a frozen Christmas pudding.  I thought choc chip strawberry icecream, vanilla bean ripple and all encased in rich chocolate fudge icecream.  Will let you know how I go.

We have also been experimenting with glucose powder as a way to introduce Miss A to some higher fructose foods.  She is loving banana smoothies with yoghurt, a handful of strawberries, rice bran and some glucose powder.  I am hoping this will mean she can eat some cherries at Christmas, by mixing them into an icecream and using the glucose to balance out the fructose.  Feeling like a mad scientist!

I also have to share the break through we have had with Miss A's eczema.  I saw an article on a current affairs show for Robertsons Skin Repair.  This is an ointment that is all natural, basically made up of cod liver oil and oatmeal, and it actually works!  You apply 3 times a day, and in our case, the eczema has cleared up.  We no longer need to use steroid creams and Miss A has a lovely smooth face free of scabs!  She is no longer itchy all the time or oozing and bleeding.  Her skin is smooth, and free of the roughness she has always had.  It is not a cure, if we don't use the eczema comes back, but it is making it liveable for us.

On to the promised recipe!  In South Australia, we have always called Italian ice cream 'gelati', so I was confused when I saw all the signage changing to 'gelato'.  Was it the same stuff, or something different?  Was it a change inspired by America, like so many of our language changes are?  The answer is that it is the same, and that the change has come from us calling it the wrong name for all those years.  Who knew?  Will be hard to make the change!  So given all of this, I googled to find Miss A's favourite flavour, chocolate!  I found this low fat recipe on taste.com.au, and it is fantastic!  It uses cornflour to make the custard base, rather than egg yolks.  I will try this method on other flavours!

CHOCOLATE GELATO
INGREDIENTS
3 cups skim milk
3/4 cup caster sugar
2 tbs gluten free cornflour
3/4 cup gluten free cocoa

METHOD
Whisk together 1 cup milk with the sugar, cornflour and cocoa.  Place the remaining milk in a saucepan and bring to the boil.  Add the cocoa mixture and continue heating until it thickens.  As it starts to thicken, remove from the heat and stir periodically.  Using the gluten free cornflour means that it will thicken on standing.

Cool to room temperature, chill for an hour.  Place in ice cream maker.  Yum!

Let me know what you think in the comments.

Friday, 18 October 2013

Hamburger Patties

Spring is always a busy time for us, and this year even more so.  This is why I have been so quiet lately!  We have had a lot of specialist appointments for Miss A, school has started back and after school activities are in full swing.  Miss A and Mstr H both have concerts coming up, and both are starting up miniball (little basketball), which should be interesting...........neither are naturals with balls!  I have joined Weight Watchers to deal with my weight problem, as well.

We have been messing around with lots of fresh produce in the kitchen, all as a way to improve the health of our little family.  Both kids get really excited when I get the juicer out of the cupboard, or the ice cream machine to make frozen treats!

All is looking positive in our little house!  We have even dusted off the BBQ, in the midst of Spring Cleaning, which has given rise to this gem of a recipe I want to share with you.  I love hamburgers!  There, I said it!  Unfortunately, I hate the prepackaged kind, but prefer the gourmet, juicy, fat laden kind that you get in cafes and restaurants.  I had never made them myself, as I really dislike playing around with raw meat, but when in need a quick picnic dinner one night, gave this a go.  They are yummy!  The kids both ate two each, with veg, and it is now a staple in our house.  They work hot or cold, with or without the bun.


HAMBURGER PATTIES

INGREDIENTS
500g lean, organic beef mince
1 handful garlic chives
1/2 cup nomato sauce
100g diced bacon
SeasonAll and Mixed Herbs to taste
8 slices Colby (or equilavent) cheese

METHOD
Mix all the ingredients (except the cheese) in a large bowl.  When combined, separate into 8 even portions.  Using your hands, flatten and shape the portions into hamburger patties.  Heat and oil a large fry pan or BBQ.  Carefully place the burgers on the heat, remember they are fragile.  After 2 mins, carefully flip and place a slice of cheese on the cooked side to melt.  Should be cooked after 2 mins on second side.

We served these with sauteed Silverbeet, straight from the garden, and barbequed Portabello mushrooms.  You can serve with a roll or bread, but they are lovely on their own.  With the sauce in the mix, you don't really need any condiments, depending on your taste.

I hope you enjoy these as much as we do!  Let me know what you think in the comments.  Will keep you updated with test results for Miss A when they come in.

Tuesday, 17 September 2013

Party Time! How to make Marshmallows, Rice Krispie Treats and Ice Cream Cake!

Mstr H is 9!  Can you believe it?  I can't!  He is getting so old!  He had his birthday yesterday, and asked for Minecraft Creeper Rice Krispie Treats to take to school, and a lasagne cook up and ice cream cake for dinner last night.  So I went to work.  I love doing lasagne night, we do normal meat with nomato sauce and make a second one of spinach and mushroom.  Everyone eats up big!  I even make some GF garlic bread for Miss A (I used a tiny amount of Garlic and some herbs in her mix.  Next time will use garlic chives instead.)  As I always fail when I try to make marshmallow in the 'cook' method, I scoured the internet for a no-cook marshmallow.  I found one!  It was posted by Jody on stayathomemum.com.au.  Here it is:

NO COOK GLUTEN FREE MARSHMALLOW

INGREDIENTS
2 cups white sugar
1 cup boiling water
2 tbsp gelatine
pinch salt
1 tsp vanilla extract

METHOD
Dissolve the gelatine in the boiling water.  In a large stand mixer, place the sugar in a clean bolw and pour in the gelatine mixture and salt.  Beat on the highest setting for approx 10-15 mins or until the marshmallow is really thick and white.  Mix in the vanilla extract.  If you are making Rice Krispie Treats, add a whole pack of GF rice bubbles, mix, colour if necessary and press in a greased lamington pan.  Refrigerate until set.  If making marshmallow bunnies, grease your moulds and press in the marshmallow.  Refrigerate until set.  If you are making marshmallows to coat in coconut, grease a lamington pan and press in the marshmallow.  Refrigerate until set, cut into squares and roll in coconut.

See how easy it is?  I added the rice bubbles and some green food colouring and made chocolate Creeper faces.  I put these on the mix while still sticky.  When set, I cut out the squares and we were done!  Gluten, wheat, nut, egg free, fructose friendly Minecraft Creeper Rice Krispie Treats!  If you use Agar Agar instead of gelatine, and vegan chocolate for the faces, you can make vegan easily too.

After the success of the treats above, I set about trying to find a gf cheese sauce that actually works, and I found one!  The sauce in our lasagnes was perfect, so I have to share it.  The trick, it appears, is not to cook the butter and flour and make a roux, but to just mix them together, add the milk, and wait for it to thicken.  This recipe was found on a site called Carla's Gluten Free Recipe Box and I will definitely be going there again.

GLUTEN FREE BECHAMEL OR WHITE SAUCE RECIPE

INGREDIENTS
4 tbsp butter
1 Tbsp Tapioca flour
1 cup milk
1/2 cup grated cheese (optional - if making a cheese sauce)

METHOD
Melt butter in a frying pan.  Do not allow to burn.  Whisk in flour.  Slowly pour in milk while whisking constantly.  Cook and continue to whisk until it thickens to the required consistency.  Remove from heat and stir in cheese if using.

It is the first time I have actually had a gf cheese sauce work.  I doubled the amounts and it was so perfect!  Yummm!


Now to the fun stuff!  The Ice Cream Cake.  I know it isn't pretty, but trust me, the taste was incredible!  Everyone ate a huge piece and was tossing around flavours for our Christmas Ice Cream Pudding!  I think strawberry and coconut won!  I just need to work on my presentation............lol.

To start with, I made my Simple Vanilla Ice Cream out of the Cuisinart Recipe Booklet I got with my Ice Cream Maker.  I lined a cake tin with Glad Wrap, and put half of the ice cream in and pressed down tight.  I placed the tin in the freezer to harden.  Then I added 1 tbsp of cocoa to the rest of the ice cream.  It made a light chocolate taste that was not too overpowering.  I placed that bowl in the freezer too as it was quite melted by then.

Next I brewed a decaffinated coffee pod in our coffee machine and refrigerated that.  Then I crushed up a pack of plain chocolate gluten free biscuits, the Macro brand double choc ones but any will do, and put a layer of that on the vanilla ice cream, and smoothed the chocolate ice cream over the top.  Back in the freezer it went.  Now is the good bit!  I whipped up 600 mls of thickened cream and added 2/3 cup icing sugar.  Just as it got really stiff, I added half of the shot of coffee and mixed it in.  This was then spread on top of the chocolate ice cream to make a harder base (when you turn the cake out).  Back in the freezer for at least 2 hours to get really hard.

20 mins before you cut it, you need to take it out of the freezer to soften slightly, and turn out onto a plate.  And voila!  You too can have an ugly, but delicious, ice cream cake!  Now to work on making to pretty for next time!  I love that the ice cream is home made for this, it gives a great sense of achievement, even if I did cheat by using ready-made biscuits!

If you want the ice cream recipe, you can find in one of my previous posts.  Let me know what you think in the comments.


Sunday, 18 August 2013

Spinach and Mushroom Lasagne and Simple Chocolate Ice Cream

Looking at my past blog posts, I notice that we have been eating a lot of red meat.  Although there are reasons, Miss A is low in iron, I still felt that I needed to balance out our diet.  This prompted me to investigate some fish options and some vegetarian options.  The lasagne recipe below is not technically vegetarian, as I use beef stock in the sauce, but you can substitute that for vegetable stock if you prefer.  I also do not make my own pasta, I have not found a GF recipe that works for me, so I have used the San Remo GF mini lasagne sheets.  These have a fairly chewy consistency, so if you can get them, I recommend the frozen sheets that are fresher when thawed.  I have not included a bechamel sauce recipe as mine has failed the last 2 times I have tried to make it.  I will trial a new recipe and keep you posted.

I have also included a simple ice cream recipe.  I usually make the custard based ice creams, but these simple ones are great on the side of a nice dessert, and the kids love them in cones.  Mstr H will prefer these to the store bought ones, even though he has no dietary needs at all.  He just likes the taste!  Homemade ice cream has a freshness you just can't get in a plastic tub!

We have hit birthday season with Miss A's bday a few weeks ago, Craig's in just over a week and Mstr H's in 4 weeks.  I have decided to discard the idea of catering for Mstr H's party, and will just order in some pizzas for the boys, while taking Miss A to the movies.  Much easier than trying to make party food for a heap of 9 year old boys!  Although I am loving that I make the food my kids eat, there are times when I need to take a break and let someone else do the cooking.


SPINACH AND MUSHROOM LASAGNE

INGREDIENTS
GF lasagne sheets
1L bechamel cheese sauce
500g sliced mushrooms
500g baby spinach leaves
100g baby kale leaves
100g rocket, chopped finely
1 cup Nomato sauce
2 cups beef stock (optional - can be substituted for vegetable stock)
2 cups grated Colby cheese
Mixed herbs and spices
Knob butter, dairy free spread, or oil, as preferred

METHOD
Melt butter, spread or heat oil in a large frypan.  Saute mushrooms lightly.  Add spinach, kale and rocket and cook until wilted.  Add Nomato sauce, stock and herbs and spices to taste.  Be aware that the rocket has a pepper taste, so you may not need to add more pepper.  Simmer until reduced and sauce is thick.

Preheat oven to 180C.  In a lasagne dish, put a layer of mushroom sauce, a layer of bechamel sauce, a layer of pasta.  Repeat.  Top with remaining bechamel sauce and grated cheese.  Bake for 45 mins.


SIMPLE CHOCOLATE ICE CREAM (from the Cuisinart Ice Cream booklet)

INGREDIENTS
3/4 cup cocoa
2/3 cup granulated sugar
pinch salt
1 cup whole milk (I use skim)
2 cups thickened cream
1/2 tbsp vanilla essence

METHOD
In a medium bowl, whisk together sugar, salt and cocoa.  Add milk and whisk until sugar has dissolved.  Add remaining ingredients, and mix until combined.  Here, the recipe suggests refridgerating for 2 hours, but I put straight in ice cream maker.

Churn in ice cream maker until frozen, about 20 mins.  Will need to be put in freezer for about 20 mins to firm up.

Let me know what you think in the comments!  My next installment - Veal Scallopini Funghi!  Yum!

Thursday, 15 August 2013

Old School Beef Casserole with Cheesy Polenta Dumplings and Simple Vanilla Ice Cream

It has been a while since my last post because my husband and I had a lovely weekend away in the Clare Valley.  The food and wine was spectacular and we had a great stay at the Clare Country Club.  I definitely recommend it.  Beautiful view of the lake, great food, great service.  Meanwhile, on the home front, the kids were sick, so we have had a busy few days with doctors appointments and just looking after little people.

I thought I would share with you this great casserole dish that I got from my Granny when she was still with us.  It is a lovely, homely recipe with the surprise of the cheese dumplings to soak up all the juices.  It is a complete meal in itself and needs no sides.  I have, of course, tweaked it a bit to make it allergy friendly.  Feel free to tell me what you think in the comments.  I believe it was originally published in a Readers Digest cookbook called One-Dish Meals, the Easy Way, but has been altered a few times since then.


OLD SCHOOL BEEF CASSEROLE WITH CHEESY POLENTA DUMPLINGS

INGREDIENTS
1.5 kg chuck steak, cut into cubes
1/4 cup maize flour
generous pinch salt and pepper
3 tbsp vegetable oil
1 leek, chopped
2 sticks celery
2 green capsicums, cored and sliced into rings
1 cup homemade beef stock (see previous post)
2 cups Nomato sauce (see previous post)
1/4 cup tamari soy sauce
1 tsp sugar
Mixed herbs and spices to taste

Dumplings:
3 cups water
Good pinch salt
1 cup polenta
30g butter or dairy free spread
1 cup grated Colby cheese
1 egg, lightly beaten
Paprika for garnish

METHOD
Dredge the cubed beef in flour, salt and pepper.  In a frypan, heat the oil until smoking, add the beef and brown for 6-7 mins.  Place in a large casserole dish.  To the frypan, add the veg and cook for 5 mins, stirring occasionally.  Add the sauces, stock, herbs and spices and bring to boil.  Put into the casserole dish with the beef and mix to combine.  Place in a 180C oven and bake for an hour.

Prepare the dumplings.  Bring the water to a boil and add the polenta and salt.  Reduce to low heat and simmer for 15 mins stirring occasionally.  When thickened, remove from the heat and beat in the butter, cheese and egg.  Remove the casserole from the oven, and arrange the polenta in mounds on the top.  Sprinkle with paprika.  Return to the oven for 30 mins.


To follow and extravaganza of this nature, you need something simple.  Here is a really simple Vanilla Ice Cream recipe that I got out of the cookbook for my icecream machine.  I refuse to buy icecream for my kids as it is such a hotbed of additives, sugar and, unfortunately, wheat in that sneaky glucose syrup.  By making my own, which only takes a few minutes of prep, I know what they are eating, as well as the quality of my ingredients.  This recipe comes from the Cuisinart Recipe Booklet and it is really yummy.  It is smooth and creamy with a strong vanilla taste, perfect on a chocolate pudding or in a GF cone.

SIMPLE VANILLA ICE CREAM

INGREDIENTS
1 cup whole milk (I use skim and it is lovely)
3/4 cup granulated sugar
pinch salt
2 cups thickened cream (I use light)
1 tbsp pure vanilla essence

METHOD
Whisk together sugar, salt and milk, until the sugar has dissolved.  Add the cream and essence and mix to combine.

Here, the recipe suggests you chill for 2 hours, but I have found pouring straight into the ice cream maker works fine.  Refrigerate if you like, or just churn until frozen.  This will be a very soft consistency, so you will need to freeze for a short time to firm it up.  Store in an airtight container in the freezer.

Makes 5 cups of ice cream.

Wednesday, 7 August 2013

Gluten Free and Fructose Friendly Coffee Scrolls

Day 2 of our influenza quarantine, and I got a little bit bored.  Miss A spent most of the day sleeping, not surprising considering she has a 40C temperature, and there is only so much television you can watch.  Mstr H was off at school, Daddy at work, so it was just me and Sleeping Beauty.  I decided to watch Great Australian Bake Off, to see dozens of golden, shiny, dripping in deliciousness coffee scrolls, and thought to myself, what a shame you can't make lovely bakes like that that are gluten free.  The sultanas rule out the fructose quota, and you just can't get gluten free dough that you can knead.

I sat there for a while, thinking about the deliciousness, and also contemplating the cruelty of no caramel ice cream, due to not being able to use brown sugar (high fructose), so I decided to play with a couple of recipes.  The ice cream was a disaster, it turns out I burned the caramel and it tasted wrong.  I will try again.  The scrolls are lovely.  With all this creative energy, I completely forgot to cook dinner, so Daddy came home and there I was, up to my elbows in baking, the kitchen looking like a war zone, and no dinner to be seen.  Oops!

Being a lovely guy, he whipped up some quesadillas while I finished up and we ate late.

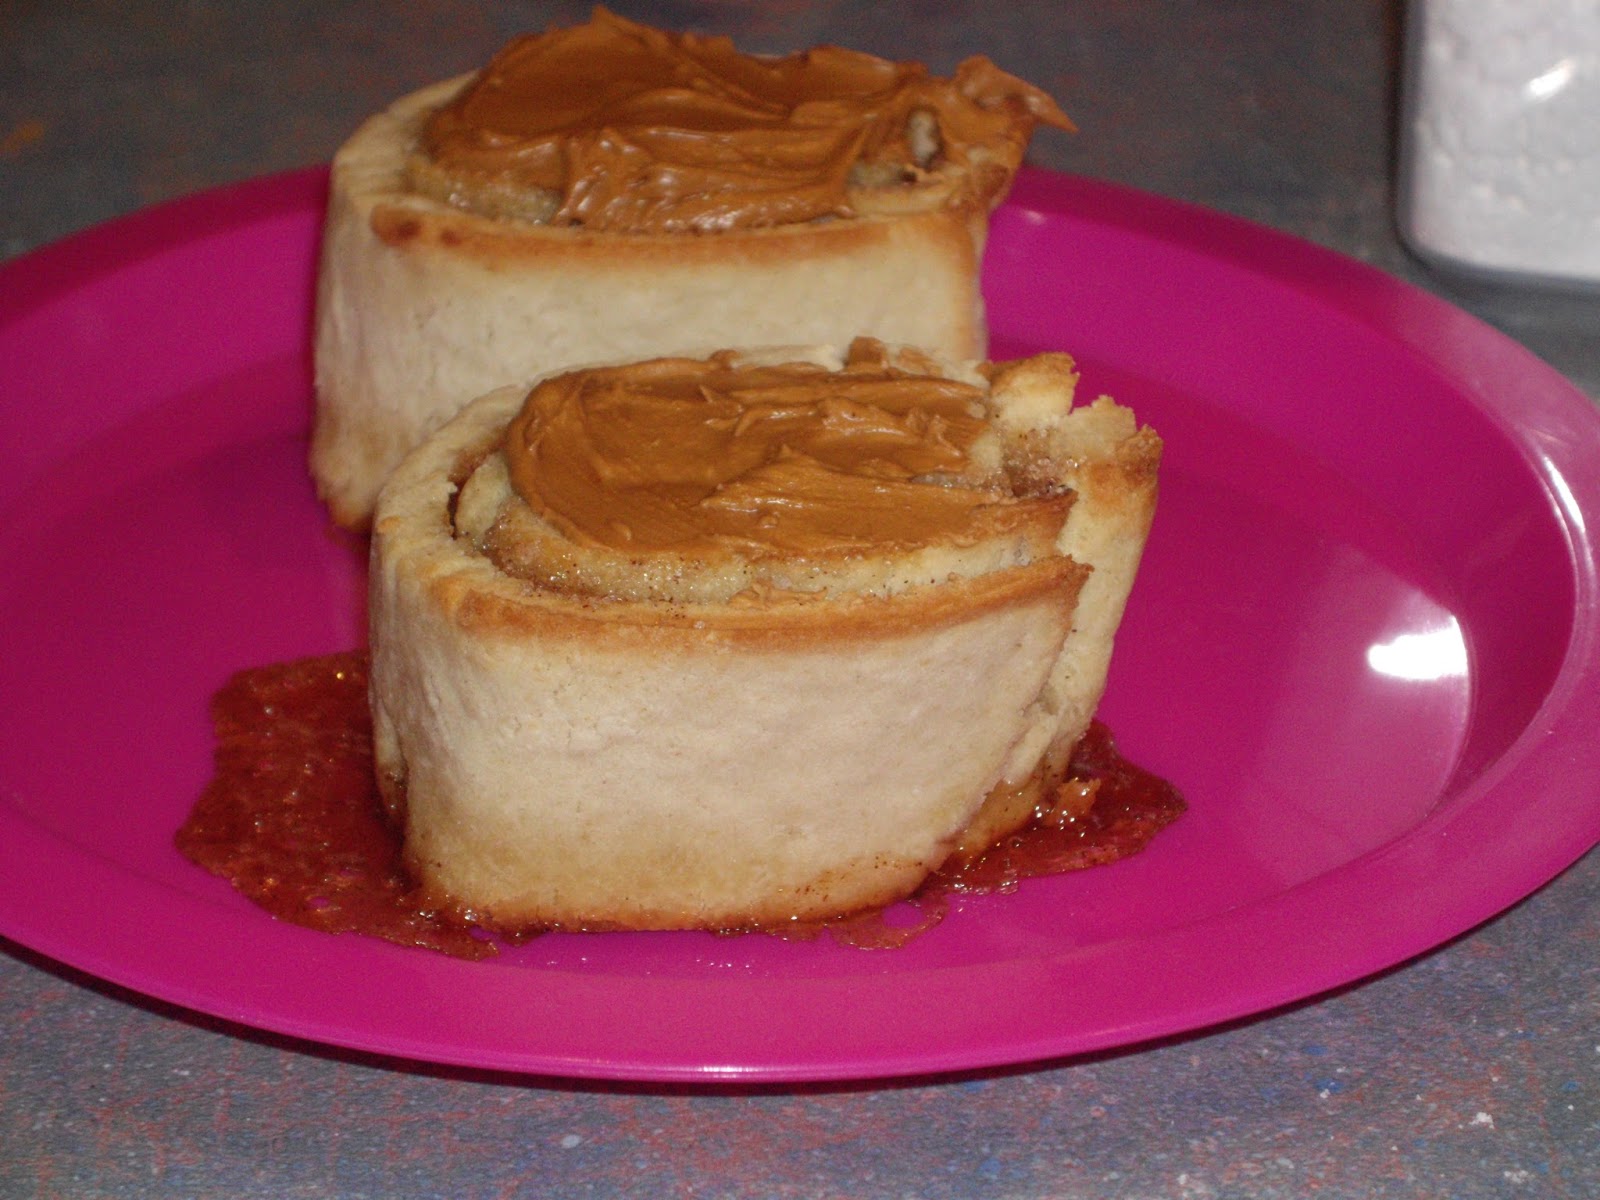
Back to the scrolls.  They are not like the usual wheat scrolls, they are not as light and they did not rise like a normal scroll would.  Having said that, they are still soft and sweet and taste lovely with a cuppa.

COFFEE SCROLLS

INGREDIENTS
1 3/4 cup warm water
1/3 cup white sugar
1/4 cup oil
3 tbsp dry yeast
sprinkle salt
2 tbsp GFG (gluten free gluten - available at any supermarket)
3 1/2 cups GF plain flour
2 cups rice flour

FILLING
1/4 cup sugar
1 tsp cinnamon
1/4 cup melted butter

METHOD
Place the water, sugar, oil and yeast in a medium bowl, mix and leave to activate for 15 mins.  Add the salt, gfg and flours and mix until smooth.

Turn out onto a floured surface and knead.  Yes, this dough will knead like a normal dough!  Knead for 10 mins and shape into a rectangle.  Roll out into a long rectangle, and cut off any messy edges.

Mix the sugar and cinnamon for the filling.  Brush dough with the butter and sprinkle liberally with the sugar mixture.  Starting with the long side of the rectangle, roll into a tight scroll.  Cut into 12 even scrolls.

Place on a line baking tray, and brush the tops of the scrolls with left over butter.  Bake at 200C for 15 mins.  Remove from oven and put on wire rack to cool.

When cool, ice with coffee frosting.  Dissolve 1 tsp of granulated coffee in a tbsp hot water.  Add icing sugar until desired texture is reached.  Drizzle if thin, or spread on scrolls.

Let me know what you think in the comments!  If you are wondering about the pink plate, we have a whole pink section in the house as a way to prevent cross contamination or diet errors.  If I cook something that is not ok for Miss A to eat, I will make her food on the pink plate, using pink utensils and she knows that is safe food.  Makes for less chance of mistakes at parties.

Tuesday, 6 August 2013

Coconut Frozen Yoghurt

Health update for today - Miss A has the flu!  She is quarantined until Sunday, meaning a missed birthday party, missing out on ballet and a miserable little girl.  She is fighting high fevers, grumbles and asthma attacks, pretty worrying actually.  So we are still in comfort food mode, leading to me posting about her favourite 'feel better' food, homemade coconut frozen yoghurt.

I have an icecream maker, thanks to Mum, and it is amazing.  We like to try different flavours, and all organic.  I love knowing exactly what is in it, without all the rubbish.  Icecream can be a lot of hard work, between cooking the custard mix, and the chilling time, but frozen yoghurt has none of that.  Mix and churn, baby!

COCONUT FROZEN YOGHURT

INGREDIENTS
1 1/2 cups coconut milk
1 1/2 cups greek yoghurt
3/4 cups caster sugar
few drops essence

 METHOD
If you have a normal icecream churner/maker, remember to freeze your bowl the night before.  These machines work by freezing the mixture as churning it, so have to be really cold.  If you are making by hand, freeze the mixture, beating every hour or so until frozen.

Mix together all the ingredients until the sugar is dissolved.  Place in churner until frozen.  As the yoghurt tends to set very hard, I freeze in individual serves.  After churning, the yoghurt will be very soft, so you need to freeze for an hour before it is completely set.  My kids love it soft so will usually eat it straight out of the machine!  Serve on its own, with fresh fruit or topped with toasted coconut.

VARIATIONS

VANILLA FROZEN YOGHURT
Swap the coconut milk for greek yoghurt, omit the coconut essence, add 1 tsp vanilla essence.  For a more decadent yoghurt, add a vanilla bean to the mix.

CHOCOLATE FROZEN YOGHURT
Swap the coconut milk for greek yoghurt, add 1 tbsp cocoa powder, omit the coconut essence.  Add choc chips by grating some good quality dark chocolate, we like Lindt 70%.

COFFEE FROZEN YOGHURT
Swap the coconut milk for greek yoghurt, add 2 tbsp prepared strong coffee (we use organic decaffinated), omit the coconut essence, add choc chips as per Chocolate Frozen Yoghurt.

I hope you enjoy this sweet treat as much as we do.  Let me know what you think in the comments.

Sunday, 4 August 2013

Vanilla Buttercream, Chocolate Cupcakes and Mocha Mudcake

Yesterday was Miss A's 7th birthday, and it was so busy!  By the time I made 36 mini vegan doughnuts (see my link to Chocolate Covered Katies blog in a previous post), topped with pink icing and sprinkles for school, 12 chocolate panda cupcakes and a large panda mocha mudcake, I was all worn out!  I was disappointed when the children who eat normal food did not like my creations, but most of the adults and kids who are used to GF did.  Proves that GF is an acquired taste.  It also meant that Miss A got to eat 10 of the doughnuts, so she was in heaven!  Surprisingly we didn't even get a full out for the amount of sugar she consumed, so I was really happy.  I felt renewed in my efforts that I could give my daughter a beautiful birthday, and not have a sick girl the next day.

Now, I chose pandas because they are cute, and really easy to replicate.  I cheated and bought some of the black candy melts (never again!  Really hard to work with compared to chocolate and the taste was not good either.  Normal dark chocolate next time!) and the ready-made candy eyes.  Now is the easy part, I drew a template of big, panda eye circles in biro on a white sheet of paper, a triangle nose piece and two half circles for ears.  Mstr H did the same, but smaller for the cupcakes.  Then I made a baking paper cone for piping and melted the black candy melts.  If you place baking paper over the templates, you can use it as tracing paper and the set chocolate/candy melts come right off with no fuss.  It also means you can use one template for many shapes.

I melted the chocolate/candy melts and piped the shapes and filled in, and while still wet, placed the candy eyes on top of the eye pieces.

You may think that mocha is a strange flavour for a 7 year old, but you need to understand that with the strict nature of Miss A's diet, her tastes are slightly different to most kids her age.  And yes, I use organic, decaffinated coffee in my cooking, so they get the taste, not the nasties.

The following cake recipes are not mine, they have come from cookbooks, but I am not sure which ones.  Since we started this diet, we have been copying and altering recipes to see us through from books from the library, so this is part of the collection.

CHOCOLATE CUPCAKES

INGREDIENTS
Dry:
1 1/4 cup gluten free SR flour
1/2 cup caster sugar
1/4 cup cocoa
1/2 cup Sweet William dairy free choc chips

Wet:
1/3 cup vegetable oil
2/3 cup water
1 tsp vanilla essence

METHOD
Preheat oven to 170C and grease and line a 12 hole muffin tin with patty pans.  Mix dry ingredients in a bowl.  Make a well in the centre and add wet ingredients.  Mix until they form a batter, but do not mix too much.  Spoon into prepared pans, filling close to the top of each case.  Bake for 15-20 mins, or until a skewer comes out clean.  Cool in tray for 5 mins before turning onto a wire rack. Top with chocolate frosting or vanilla buttercream when cool.


MOCHA MUDCAKE

INGREDIENTS
3 tbsp strong coffee
250g Sweet William dairy free choc chips
180g Nuttelex
1 tsp vanilla essence
1/3 cup cocoa powder
1 cup caster sugar
3 eggs
1/2 cup fine rice flour
1/4 cup potato flour
1/4 cup maize flour
1 tsp xanthan gum

METHOD
Preheat oven to 160C.  Grease and line a 20cm round cake tin.  Place the coffee, chocolate, Nuttelex, vanilla and cocoa powder in a medium glass bowl.  Set over a saucepan of simmering water (make sure the base of the bowl does not touch the water) and stir until melted and well combined.  

Place the sugar and eggs in a large bowl and beat with electric beaters on high for 3-5 mins, or until light, fluffy and doubled in volume.  Gradually fold in the chocolate mixture, stirring gently with a metal spoon to combine.

Sift the flours and xanthan gum three times into a large bowl.  Gradually fold into the chocolate mixture with a metal spoon.

Pour the batter into the tin and bake for 50-60 mins.  Remove from oven and allow to cool in the tin for 15 mins before transferring to a wire rack to cool completely.


VEGAN VANILLA BUTTERCREAM 

INGREDIENTS
500g pure icing sugar, sifted
250g Nuttelex
1 tbsp vanilla essence

METHOD
Beat the butter until light and fluffy.  Add half the icing sugar and the essence and beat until all the sugar is combined.  Add the remaining icing sugar and beat til light and fluffy.  Add colouring of choice or leave white for a fluffy look.  

To create the panda look, I covered the cake completely in the buttercream, topped with a sprinkle of dessicated coconut for fur and added the chocolate shapes.  Voila!  Easy cake decorating!  haha

Let me know what you think in the comments.