Showing posts with label Lunch box. Show all posts

Wednesday, 25 February 2015

Quinoa Hash Browns, and be kind to each other!

As a mother, I try to keep abreast of healthy eating options.  We all do.  We join parenting websites, healthy eating blogs, and Pinterest so we know how to make our Acai berry, quinoa chia puds look like rainbows. We constantly assess our parenting based on what we find on the web, and usually find ourselves wanting.  So we try harder and seek answers from our peers via chatrooms, forums and Facebook pages.

The problem with this is that many of us are very judgemental of each others journeys.  We believe that the information we have gotten from our painstaking research is better or more complete than the information our peers have gotten from their painstaking research.  Unfortunately, for every eating plan, way of life or super ingredient out there, there is as much research to say that it is rubbish as there is to say it is the answer for perfect health.  We also need to consider that we all have different goals and ideas of what is healthy.

I remember a conversation with a close friend, that we had when our children were very little.  We met for a picnic, and both brought food to share.  We brought Christmas pretzels and chips, they brought cake and chocolate (this was prior to our knowing about Miss A's allergies!).  I was worried about my children eating cake and chocolate due to the high sugar and fat content.  I allowed them a small amount.  My friend was concerned about his children eating pretzels and chips due to the high salt and carbohydrate content.  This struck a chord with me in that we were both trying to be the best parents we could be, but we were coming at the problem from opposite angles.

One of the chat pages I belong to had a similar discussion yesterday regarding soy.  Several mums were asking about soy as a substitute for dairy in the case of lactose intolerance.  What they received as advice was a minefield of polar opposites.  From people telling them that soy is a great milk substitute, people saying that only Japanese soy is ok as fermented, people saying only unfermented Australian soy is ok, and people saying all soy is bad and every male child that drinks soy will grow man boobs.  I am not even exaggerating!  This very quickly dissolved into personal attacks, but the most confronting problem was that all sides of the argument had scientific evidence to support it.  How can this be?  I don't know, but it is very frustrating.  How can we as consumers have any idea of what to feed our families, when even the experts can't agree?

All I can say is that we need to be respectful of each other's points of view.  All of us who are dealing with healthy eating issues and allergies and intolerances are doing our best.  We are researching as much as we can and picking out what we can handle and making do with what we cannot.  Because of this, we all need to be supportive of each other and not attack other parents for doing their best.  Just because a child has packets and additives in their lunch box does not mean they are less loved or cared for.  It means that today his Mum gave him biscuits and muesli bars for lunch.  Just because a lunch box is all healthy, hand made food does not mean that child is brainwashed and missing out on treats.  It means that her Mum is trying to feed her healthy alternatives to hopefully make her healthier and happier.  Or that the child is allergic to everything and her mother has no choice.....

Rant over!  Now here is a really yummy breakfast idea that has quinoa in it.  I don't know if this means it is healthy, or that we will now live forever for eating this Superfood, but it tastes good and provides a different grain for those who are gluten free.


I got this recipe from a blog called A Beautiful Mess, made a few obligitary changes and now it is a regular in our house.  I use a pancake maker, a cheap electric appliance that I got from a cheap shop, to make my hashbrowns.  This means that apart from a small amount of spray oil on the hotplates, there is no added fat.  They are lovely fried in butter, not so lovely fried in Nuttelex.

QUINOA HASH BROWNS

Ingredients
1/3 cup tricoloured quinoa (any quinoa will do, but this one looks prettier)
2/3 cup water
1 1/2 cups grated raw potato
1 egg
Season All to taste
Chives to taste
Optional - 1/2 cup grated lactose free cheese

Method
Place quinoa and water in a saucepan.  Bring to the boil.  As bubbles start to appear, cover and turn down the heat to low.  Leave simmer to 10 mins.  Turn off the heat, and leave covered for 10 mins so that the quinoa can absorb the water.

In a bowl, mix the potato, egg, SeasonAll, chives, cheese (if using) and quinoa.  When combined, place spoonfuls either into Pancake Maker and cook until golden.  Can also be fried in butter, nuttelex or presumable coconut oil.  Flip when a golden crust forms on the bottom.

Great served with eggs and bacon.

Wednesday, 4 December 2013

Party Share Plates


Miss A's class was having a shared recess today.  This is where all the Receptions and Year 1s take in a plate of food to share.  Obviously these sorts of situations can be stressful with dietary issues, and there is no real right way to tackle them.  Because of the stress that can be felt, I thought I would share with you what I do to give you ideas for tackling your own challenges.

Firstly, I like to take a selection of food so that if there is nothing else she can eat, Miss A has some variety to choose from.  Given all the yummy-looking food that will be there, it also needs to be presented nicely.  She misses out on so much, the last thing she needs is to share an ugly plate of food.  I also try to make the plate healthy-ish, but palatable so she doesn't feel unsatisfied.

For this recess, I decided to make watermelon trees, choc dipped strawberries and some gluten free chocolate muffins.  I cheated and used the Orgran Chocolate Muffin mix.  Usually for this mix I add a grated zucchini, it makes it really moist and yummy with the hidden veg to add nutrition, but from past mistakes I have realised that these things are an aquired taste born from necessity.  None of Miss A's friends appreciate this sort of effort so her food ends up being passed over by the other children as 'yukky' or 'strange'.  Instead I made as per the packet instructions and used a delicious chocolate butter frosting to top.  The recipe for the frosting I got from google, but cannot remember the page.  Feel free to let me know if it is your recipe and I will give credit.

It is 1 cup butter and 1/2 cup cocoa, whipped until smooth.  Add 5 cups pure icing sugar and 1 tsp vanilla essence and continue beating.  Gradually add small amounts of milk until the desired consistency is reached.  I made this as a soft frosting to be extra gooey and yummy for little people.  If you have never choc dipped a strawberry, just melt some choc melts (I used dark, but white or milk work too), and dip the strawberries in, leaving the green leaves at the top.  Place onto some baking paper on a tray and put in the fridge to harden.  The chocolate will not stick to the baking paper so this works perfectly.

You don't need to do a sweet platter, nice savoury platters are easily achieved with your favourite quiche slice recipe, popcorn and veg cut into sticks, or popcorn, cheese and ham sticks and gluten free jaffas makes a lovely supper.  Lots of ideas to get creative with.  With important thing is variety and presentation.  This is what makes it bearable for little people who can't eat off of anyone else's plate.

Let me know your ideas in the comments.

Strawberry Shortcake


It was my dad's birthday a while back, and when thinking of the birthday cake, which I obviously offered to prepare, I drew a blank.  You can only make mudcake so many times.  We are all getting sick of it.  I remembered seeing a recipe in the ones my mum got from the library for Strawberry Shortcake (which was a red headed doll in my day!) and thought I would give it a go.

Being a sponge-type cake I was dubious.  The gluten free ones I have tried in the past have a nasty after taste and are just 'not quite right' in the consistency/texture feel.  They have always been a big disappointment.

I tried this one, and although it is still a different consistency to a normal sponge, it works with the cream and strawberries.  Looks pretty nice too, if I do say so myself.  The recipe comes from Lola, so here goes.

STRAWBERRY SHORTCAKE
INGREDIENTS
100g castor sugar
2 tsp butter
1 tbsp glycerine (edible - from supermarkets and cake decorating shops)
4 tbsp hot water
100g gluten free plain flour
2 tsp gluten free baking powder
2 tsp vanilla essence

Filling:
1 punnet strawberries
250 ml cream
2 tbsp pure icing sugar
few drops vanilla essence

METHOD
Preheat the oven to 180C.  Grease sides and line the bottom of 2x20cm round cake tins.

Place the eggs and sugar in a large metal or glass bowl and hand whisk over a saucepan of hot water until the mixture is slightly warm and frothy.  Remove from the heat and continue beating with an electric beater until the mixture is thick and creamy, but not stiff.  In a separate bowl, add the glycerine and butter to the hot water and let stand for 1 minute.  Fold the flour and baking powder into the egg mixture.  Mix in the vanilla and glycerine mixture.  Fold lightly but thoroughly.  Pour into prepared tins and bake for 30 mins.  Let stand for at least 1 minute before turning onto a wire rack to cool.

Beat cream until thickened and add the icing sugar and vanilla.  Continue beating until stiff.  Reserve strawberries for decoration, and thinly slice the rest.

Place down your base cake (the least pretty of your two cakes) and spread thickly with cream.  Top with a layer of strawberries.  Place the other cake on top.  Pipe swirls of cream on to the top and decorate with strawberries.  To fan you slice thinly, but not all the way through.  Fan with fingers.  When decorated, sprinkle the entire cake with icing sugar to serve.

Yummo!  A great cake to take to someone's house or to share with a cuppa!  Let me know what you think in the comments.

Friday, 8 November 2013

Creamy Tuna Mornay and Soda Bread

We are coming up to the Christmas season.  Here in Adelaide, we have the famous Christmas Pageant every year, where we sit on the side of the road and watch lots of floats with fairy tale and Christmas themes go past.  It is a real tradition, and we go every year with the kids.  We get into the city at around 6am, have a picnic brekky, the kids draw on the road in chalk, play games, and then the pageant does its thing, and we have a great time.  Tomorrow is the day!  This heralds the season for Christmas baking, house decorating and present buying and wrapping, if you haven't done it already.  Santa comes with the Pageant, so he starts appearing in stores to get the lists from hopeful children, and the streets get their Christmas overhaul.

This means that my posts between now, and the big day, will probably focus on Christmas or party treats.  Watch this space if you need some ideas!  Last night I was planning to make our family favourite meat pie, but after a bad day, I just didn't have the energy.  Here is one of our family favourites, with our favourite loaf of fresh bread to munch, covered in butter, on the side.

This recipe comes from Food.com, and the Soda Bread comes from dovesfarm.co.uk.

TUNA MORNAY
INGREDIENTS
1 tbsp butter
3 sticks celery, finely diced
2 tbsp gf plain flour
1 1/2 cups milk
1 cup cream
2/3 cup grated cheese
1 440 g can corn (drained), or 1 cup frozen peas and corn mix
425 g can tuna in springwater, drained
1/2 cup bread crumbs (I freeze the ends of gf bread, or any stale bread, thaw and put in the whiz to make crumbs.  Add some herbs and spices, and freeze in ready to use packs)
1/4 cup grated cheese, extra

METHOD
Melt butter and saute celery for approx 3 mins.  Add flour and stir over heat until bubbling.  Remove from heat and slowly stir in milk and cream.  Return to heat and continue stirring until thickened.  Add cheese, corn, and tuna and mix to combine.  Place in a casserole dish and top with crumbs and extra cheese.  Bake at 200C for 15 mins.  Serve with soda bread.


SODA BREAD
INGREDIENTS
500g gluten free white flour blend
1/4 tsp salt
1 2/3 tsp baking powder
2 tsp Xanthan Gum
1 tsp vinegar
1 tbsp olive oil
500ml milk, or rice milk
2 tbsp milk or rice milk, extra

METHOD
Mix together dry ingredients.  In a jug, mix oil, vinegar and milk.  Pour the milk mixture into the flour mixture and mix to combine, until a soft, sticky dough is formed.  Press into a loaf tin, brush the top with extra milk, and bake at 180C for 90-100 mins.  I find mine is baked after 45 mins, so check every 30 mins or so.  Serve warm topped with your favourite spread.

Can be made into muffins or rolls, just by pressing into smaller tins.

Friday, 18 October 2013

Hamburger Patties

Spring is always a busy time for us, and this year even more so.  This is why I have been so quiet lately!  We have had a lot of specialist appointments for Miss A, school has started back and after school activities are in full swing.  Miss A and Mstr H both have concerts coming up, and both are starting up miniball (little basketball), which should be interesting...........neither are naturals with balls!  I have joined Weight Watchers to deal with my weight problem, as well.

We have been messing around with lots of fresh produce in the kitchen, all as a way to improve the health of our little family.  Both kids get really excited when I get the juicer out of the cupboard, or the ice cream machine to make frozen treats!

All is looking positive in our little house!  We have even dusted off the BBQ, in the midst of Spring Cleaning, which has given rise to this gem of a recipe I want to share with you.  I love hamburgers!  There, I said it!  Unfortunately, I hate the prepackaged kind, but prefer the gourmet, juicy, fat laden kind that you get in cafes and restaurants.  I had never made them myself, as I really dislike playing around with raw meat, but when in need a quick picnic dinner one night, gave this a go.  They are yummy!  The kids both ate two each, with veg, and it is now a staple in our house.  They work hot or cold, with or without the bun.


HAMBURGER PATTIES

INGREDIENTS
500g lean, organic beef mince
1 handful garlic chives
1/2 cup nomato sauce
100g diced bacon
SeasonAll and Mixed Herbs to taste
8 slices Colby (or equilavent) cheese

METHOD
Mix all the ingredients (except the cheese) in a large bowl.  When combined, separate into 8 even portions.  Using your hands, flatten and shape the portions into hamburger patties.  Heat and oil a large fry pan or BBQ.  Carefully place the burgers on the heat, remember they are fragile.  After 2 mins, carefully flip and place a slice of cheese on the cooked side to melt.  Should be cooked after 2 mins on second side.

We served these with sauteed Silverbeet, straight from the garden, and barbequed Portabello mushrooms.  You can serve with a roll or bread, but they are lovely on their own.  With the sauce in the mix, you don't really need any condiments, depending on your taste.

I hope you enjoy these as much as we do!  Let me know what you think in the comments.  Will keep you updated with test results for Miss A when they come in.

Tuesday, 17 September 2013

Party Time! How to make Marshmallows, Rice Krispie Treats and Ice Cream Cake!

Mstr H is 9!  Can you believe it?  I can't!  He is getting so old!  He had his birthday yesterday, and asked for Minecraft Creeper Rice Krispie Treats to take to school, and a lasagne cook up and ice cream cake for dinner last night.  So I went to work.  I love doing lasagne night, we do normal meat with nomato sauce and make a second one of spinach and mushroom.  Everyone eats up big!  I even make some GF garlic bread for Miss A (I used a tiny amount of Garlic and some herbs in her mix.  Next time will use garlic chives instead.)  As I always fail when I try to make marshmallow in the 'cook' method, I scoured the internet for a no-cook marshmallow.  I found one!  It was posted by Jody on stayathomemum.com.au.  Here it is:

NO COOK GLUTEN FREE MARSHMALLOW

INGREDIENTS
2 cups white sugar
1 cup boiling water
2 tbsp gelatine
pinch salt
1 tsp vanilla extract

METHOD
Dissolve the gelatine in the boiling water.  In a large stand mixer, place the sugar in a clean bolw and pour in the gelatine mixture and salt.  Beat on the highest setting for approx 10-15 mins or until the marshmallow is really thick and white.  Mix in the vanilla extract.  If you are making Rice Krispie Treats, add a whole pack of GF rice bubbles, mix, colour if necessary and press in a greased lamington pan.  Refrigerate until set.  If making marshmallow bunnies, grease your moulds and press in the marshmallow.  Refrigerate until set.  If you are making marshmallows to coat in coconut, grease a lamington pan and press in the marshmallow.  Refrigerate until set, cut into squares and roll in coconut.

See how easy it is?  I added the rice bubbles and some green food colouring and made chocolate Creeper faces.  I put these on the mix while still sticky.  When set, I cut out the squares and we were done!  Gluten, wheat, nut, egg free, fructose friendly Minecraft Creeper Rice Krispie Treats!  If you use Agar Agar instead of gelatine, and vegan chocolate for the faces, you can make vegan easily too.

After the success of the treats above, I set about trying to find a gf cheese sauce that actually works, and I found one!  The sauce in our lasagnes was perfect, so I have to share it.  The trick, it appears, is not to cook the butter and flour and make a roux, but to just mix them together, add the milk, and wait for it to thicken.  This recipe was found on a site called Carla's Gluten Free Recipe Box and I will definitely be going there again.

GLUTEN FREE BECHAMEL OR WHITE SAUCE RECIPE

INGREDIENTS
4 tbsp butter
1 Tbsp Tapioca flour
1 cup milk
1/2 cup grated cheese (optional - if making a cheese sauce)

METHOD
Melt butter in a frying pan.  Do not allow to burn.  Whisk in flour.  Slowly pour in milk while whisking constantly.  Cook and continue to whisk until it thickens to the required consistency.  Remove from heat and stir in cheese if using.

It is the first time I have actually had a gf cheese sauce work.  I doubled the amounts and it was so perfect!  Yummm!


Now to the fun stuff!  The Ice Cream Cake.  I know it isn't pretty, but trust me, the taste was incredible!  Everyone ate a huge piece and was tossing around flavours for our Christmas Ice Cream Pudding!  I think strawberry and coconut won!  I just need to work on my presentation............lol.

To start with, I made my Simple Vanilla Ice Cream out of the Cuisinart Recipe Booklet I got with my Ice Cream Maker.  I lined a cake tin with Glad Wrap, and put half of the ice cream in and pressed down tight.  I placed the tin in the freezer to harden.  Then I added 1 tbsp of cocoa to the rest of the ice cream.  It made a light chocolate taste that was not too overpowering.  I placed that bowl in the freezer too as it was quite melted by then.

Next I brewed a decaffinated coffee pod in our coffee machine and refrigerated that.  Then I crushed up a pack of plain chocolate gluten free biscuits, the Macro brand double choc ones but any will do, and put a layer of that on the vanilla ice cream, and smoothed the chocolate ice cream over the top.  Back in the freezer it went.  Now is the good bit!  I whipped up 600 mls of thickened cream and added 2/3 cup icing sugar.  Just as it got really stiff, I added half of the shot of coffee and mixed it in.  This was then spread on top of the chocolate ice cream to make a harder base (when you turn the cake out).  Back in the freezer for at least 2 hours to get really hard.

20 mins before you cut it, you need to take it out of the freezer to soften slightly, and turn out onto a plate.  And voila!  You too can have an ugly, but delicious, ice cream cake!  Now to work on making to pretty for next time!  I love that the ice cream is home made for this, it gives a great sense of achievement, even if I did cheat by using ready-made biscuits!

If you want the ice cream recipe, you can find in one of my previous posts.  Let me know what you think in the comments.


Wednesday, 7 August 2013

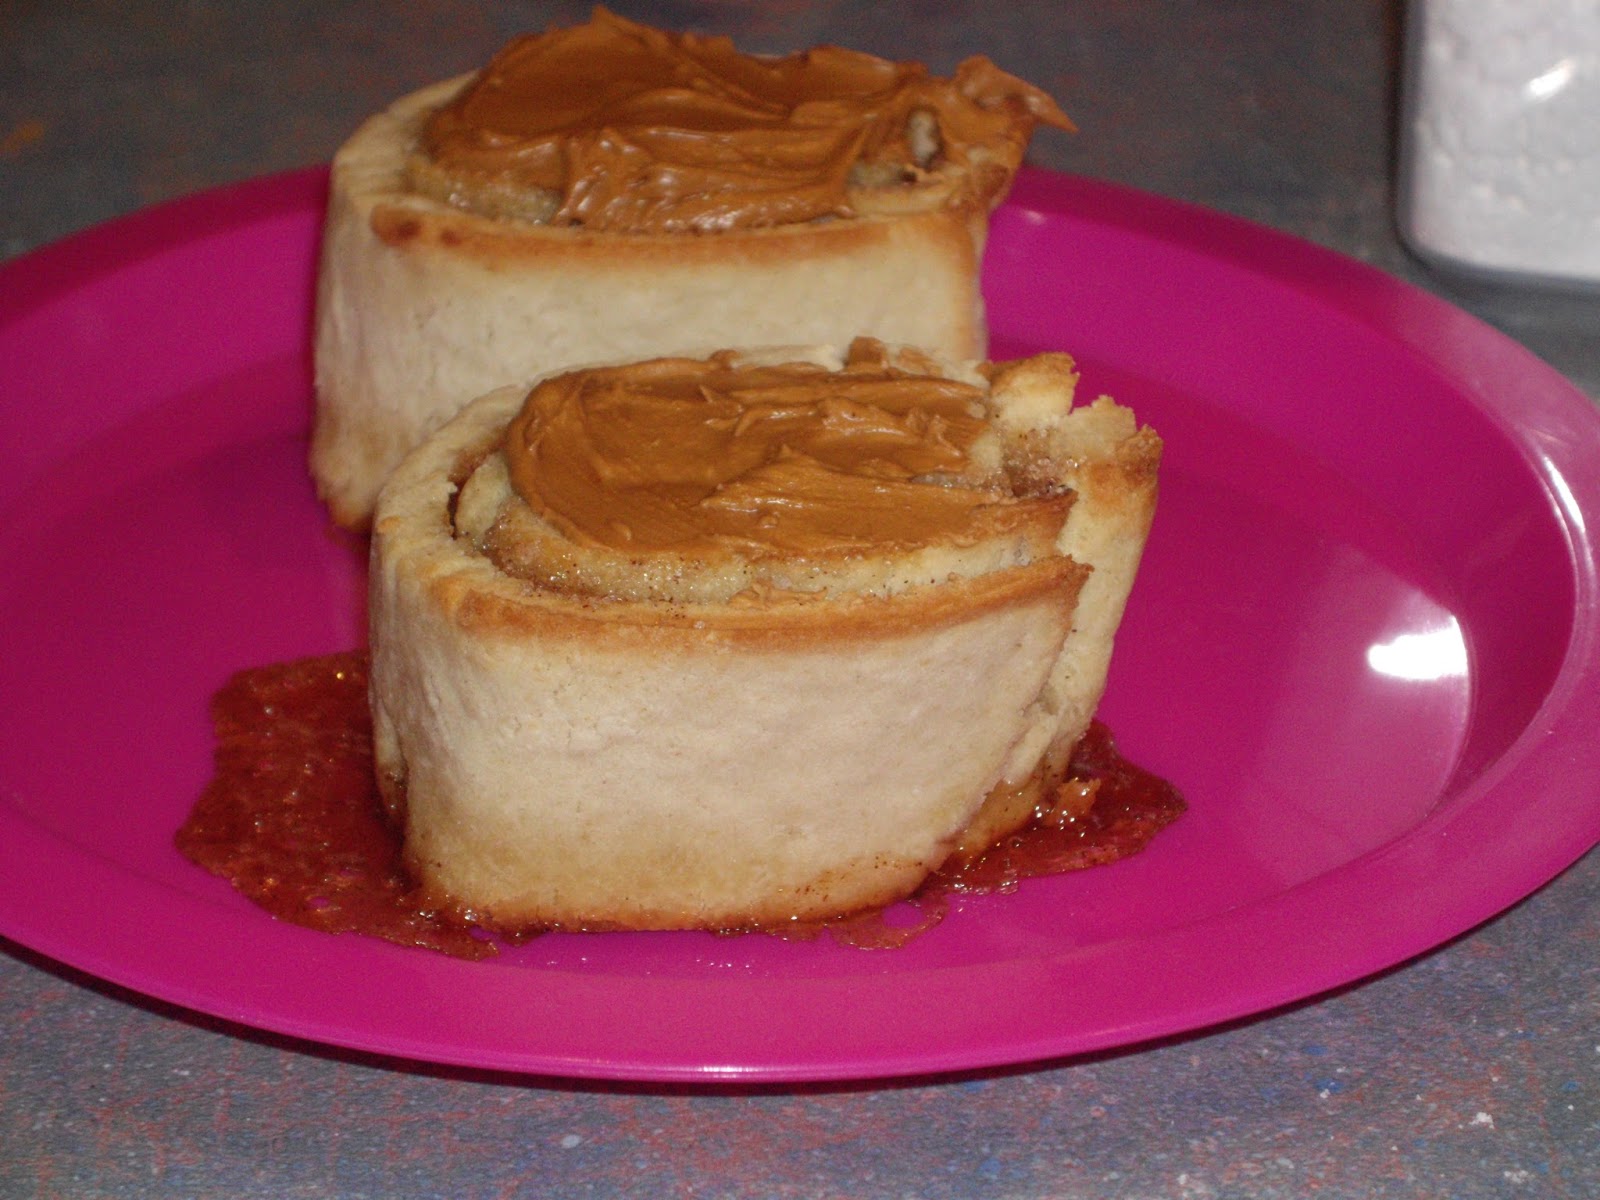
Gluten Free and Fructose Friendly Coffee Scrolls

Day 2 of our influenza quarantine, and I got a little bit bored.  Miss A spent most of the day sleeping, not surprising considering she has a 40C temperature, and there is only so much television you can watch.  Mstr H was off at school, Daddy at work, so it was just me and Sleeping Beauty.  I decided to watch Great Australian Bake Off, to see dozens of golden, shiny, dripping in deliciousness coffee scrolls, and thought to myself, what a shame you can't make lovely bakes like that that are gluten free.  The sultanas rule out the fructose quota, and you just can't get gluten free dough that you can knead.

I sat there for a while, thinking about the deliciousness, and also contemplating the cruelty of no caramel ice cream, due to not being able to use brown sugar (high fructose), so I decided to play with a couple of recipes.  The ice cream was a disaster, it turns out I burned the caramel and it tasted wrong.  I will try again.  The scrolls are lovely.  With all this creative energy, I completely forgot to cook dinner, so Daddy came home and there I was, up to my elbows in baking, the kitchen looking like a war zone, and no dinner to be seen.  Oops!

Being a lovely guy, he whipped up some quesadillas while I finished up and we ate late.

Back to the scrolls.  They are not like the usual wheat scrolls, they are not as light and they did not rise like a normal scroll would.  Having said that, they are still soft and sweet and taste lovely with a cuppa.

COFFEE SCROLLS

INGREDIENTS
1 3/4 cup warm water
1/3 cup white sugar
1/4 cup oil
3 tbsp dry yeast
sprinkle salt
2 tbsp GFG (gluten free gluten - available at any supermarket)
3 1/2 cups GF plain flour
2 cups rice flour

FILLING
1/4 cup sugar
1 tsp cinnamon
1/4 cup melted butter

METHOD
Place the water, sugar, oil and yeast in a medium bowl, mix and leave to activate for 15 mins.  Add the salt, gfg and flours and mix until smooth.

Turn out onto a floured surface and knead.  Yes, this dough will knead like a normal dough!  Knead for 10 mins and shape into a rectangle.  Roll out into a long rectangle, and cut off any messy edges.

Mix the sugar and cinnamon for the filling.  Brush dough with the butter and sprinkle liberally with the sugar mixture.  Starting with the long side of the rectangle, roll into a tight scroll.  Cut into 12 even scrolls.

Place on a line baking tray, and brush the tops of the scrolls with left over butter.  Bake at 200C for 15 mins.  Remove from oven and put on wire rack to cool.

When cool, ice with coffee frosting.  Dissolve 1 tsp of granulated coffee in a tbsp hot water.  Add icing sugar until desired texture is reached.  Drizzle if thin, or spread on scrolls.

Let me know what you think in the comments!  If you are wondering about the pink plate, we have a whole pink section in the house as a way to prevent cross contamination or diet errors.  If I cook something that is not ok for Miss A to eat, I will make her food on the pink plate, using pink utensils and she knows that is safe food.  Makes for less chance of mistakes at parties.

Sunday, 4 August 2013

Vanilla Buttercream, Chocolate Cupcakes and Mocha Mudcake

Yesterday was Miss A's 7th birthday, and it was so busy!  By the time I made 36 mini vegan doughnuts (see my link to Chocolate Covered Katies blog in a previous post), topped with pink icing and sprinkles for school, 12 chocolate panda cupcakes and a large panda mocha mudcake, I was all worn out!  I was disappointed when the children who eat normal food did not like my creations, but most of the adults and kids who are used to GF did.  Proves that GF is an acquired taste.  It also meant that Miss A got to eat 10 of the doughnuts, so she was in heaven!  Surprisingly we didn't even get a full out for the amount of sugar she consumed, so I was really happy.  I felt renewed in my efforts that I could give my daughter a beautiful birthday, and not have a sick girl the next day.

Now, I chose pandas because they are cute, and really easy to replicate.  I cheated and bought some of the black candy melts (never again!  Really hard to work with compared to chocolate and the taste was not good either.  Normal dark chocolate next time!) and the ready-made candy eyes.  Now is the easy part, I drew a template of big, panda eye circles in biro on a white sheet of paper, a triangle nose piece and two half circles for ears.  Mstr H did the same, but smaller for the cupcakes.  Then I made a baking paper cone for piping and melted the black candy melts.  If you place baking paper over the templates, you can use it as tracing paper and the set chocolate/candy melts come right off with no fuss.  It also means you can use one template for many shapes.

I melted the chocolate/candy melts and piped the shapes and filled in, and while still wet, placed the candy eyes on top of the eye pieces.

You may think that mocha is a strange flavour for a 7 year old, but you need to understand that with the strict nature of Miss A's diet, her tastes are slightly different to most kids her age.  And yes, I use organic, decaffinated coffee in my cooking, so they get the taste, not the nasties.

The following cake recipes are not mine, they have come from cookbooks, but I am not sure which ones.  Since we started this diet, we have been copying and altering recipes to see us through from books from the library, so this is part of the collection.

CHOCOLATE CUPCAKES

INGREDIENTS
Dry:
1 1/4 cup gluten free SR flour
1/2 cup caster sugar
1/4 cup cocoa
1/2 cup Sweet William dairy free choc chips

Wet:
1/3 cup vegetable oil
2/3 cup water
1 tsp vanilla essence

METHOD
Preheat oven to 170C and grease and line a 12 hole muffin tin with patty pans.  Mix dry ingredients in a bowl.  Make a well in the centre and add wet ingredients.  Mix until they form a batter, but do not mix too much.  Spoon into prepared pans, filling close to the top of each case.  Bake for 15-20 mins, or until a skewer comes out clean.  Cool in tray for 5 mins before turning onto a wire rack. Top with chocolate frosting or vanilla buttercream when cool.


MOCHA MUDCAKE

INGREDIENTS
3 tbsp strong coffee
250g Sweet William dairy free choc chips
180g Nuttelex
1 tsp vanilla essence
1/3 cup cocoa powder
1 cup caster sugar
3 eggs
1/2 cup fine rice flour
1/4 cup potato flour
1/4 cup maize flour
1 tsp xanthan gum

METHOD
Preheat oven to 160C.  Grease and line a 20cm round cake tin.  Place the coffee, chocolate, Nuttelex, vanilla and cocoa powder in a medium glass bowl.  Set over a saucepan of simmering water (make sure the base of the bowl does not touch the water) and stir until melted and well combined.  

Place the sugar and eggs in a large bowl and beat with electric beaters on high for 3-5 mins, or until light, fluffy and doubled in volume.  Gradually fold in the chocolate mixture, stirring gently with a metal spoon to combine.

Sift the flours and xanthan gum three times into a large bowl.  Gradually fold into the chocolate mixture with a metal spoon.

Pour the batter into the tin and bake for 50-60 mins.  Remove from oven and allow to cool in the tin for 15 mins before transferring to a wire rack to cool completely.


VEGAN VANILLA BUTTERCREAM 

INGREDIENTS
500g pure icing sugar, sifted
250g Nuttelex
1 tbsp vanilla essence

METHOD
Beat the butter until light and fluffy.  Add half the icing sugar and the essence and beat until all the sugar is combined.  Add the remaining icing sugar and beat til light and fluffy.  Add colouring of choice or leave white for a fluffy look.  

To create the panda look, I covered the cake completely in the buttercream, topped with a sprinkle of dessicated coconut for fur and added the chocolate shapes.  Voila!  Easy cake decorating!  haha

Let me know what you think in the comments.

Monday, 29 July 2013

Egg Puffs

My sick little girl is still sick!  Doctors this morning, with the standard diagnosis - it is just a virus.  This may be so, but we are on our third day off of school this term, and it is only week 2.  Miss A's eczema is out of control, so we are back off of milk and soy to see if that is the problem, but I suspect it is this nasty virus causing the problems.

Here is another fun egg recipe that includes veggies.  It comes out of the Jessica Seinfeld book - Deceptively Delicious, where she adds veg puree to just about everything.  Most of the recipes are not fructose friendly, but a few, like this one, are fantastic.  In the recipe she uses pumpkin, but I have found mashed carrot to be Miss A's favourite, while Mstr H prefers pureed spinach.  To puree the spinach in my blender, I add the eggs to it for moisture, otherwise it just jumps the leaves around without blending them.

INGREDIENTS
2 large eggs
4 large egg whites
1/2 cup veg puree or mash, depending on what veg you use.  Steam your veg of choice (or raw if leafy) and mash or puree as needed
2 tbsp grated cheese
2 tbsp all purpose flour (I use maize flour)
1/2 tsp baking powder
sprinkle of salt for seasoning

METHOD
Preheat oven to 200C.  Coat 6 ramekins with spray oil and place on a tray.  In a large bowl, whisk eggs, egg whites, puree/mash, cheese, flour, baking powder and salt until combined.  Divide mixture between cups and bake for 15 mins, or until puffed up and cooked all the way through.  Serve on a plate with some warm, cut up tortilla wrap (gluten free of course) or some gf toast soldiers.

Great to take as a lunch too.  Quite tasty cold.

Let me know what you think in the comments.

Thursday, 25 July 2013

Quinoa Crumbed KFC

My idea is to give you an insight into day-to-day cooking and eating for my Miss A, as so many of my friends are intrigued by what I actually feed her given the restrictions.  I hope this will be a ray of light for anyone else in a similar situation.

First off, Google is my best friend.  I have found I can type searches like 'wheat free nut free noodle recipes' and get some choices to use.  This has saved my life!  By taking these recipes and making the necessary changes for the diets we are using I can give my little one as varied a diet as possible.

Invention has also been a big help, and making sure my kitchen is stocked at all times with the necessary ingredients for everything she likes to eat.  Bearing in mind, take out is NEVER an option for us.  There is no take away food that meets her needs.

So here is today's menu for her:

Breakfast - Freedom Foods Cocoa Bombs (a special treat as she has a sinus infection today)
                 A cornbread muffin - I use the Orgran Cornbread mix, I have had no success making cornbread from scratch without the milk or egg.  It is too crumbly.

Morning Tea - A vegan doughnut (recipe to come in the next couple of days)

Lunch - Homemade Pumpkin Soup (recipe to come on future posts)
             Macro popcorn, small packet

Afternoon Tea - Coconut Rice Custard

Dinner - Quinoa Crumbed KFC, Chips, Green beans

Dessert - Homemade iceblock

This is not a normal day menu, this is the 'comfort food' version that we trott out on weekends and when she is sick.  Tomorrow will be better, I promise!  As you can see I do use premade ingredients where appropriate, but not often.  There are not many out there that I can use.  But if there is one that fits the diet and makes my life easier, I say 'Go for it!'.  I have not need to prove myself to anyone.

QUINOA CRUMBED KFC

INGREDIENTS
Chicken pieces - thigh fillets or drumsticks work best
1/3 cup Orgran Multigrain crumbs with Quinoa
1/3 cup rice crumbs
1/3 cup maize flour
egg, beaten (or rice milk to wet the meat so the crumbs will stick)
herbs and spices of choice

METHOD
Mix the crumbs and flour together with some herbs and spices for taste.  Dip chicken in egg or milk and then coat in the crumbs.  Then bake in a moderate oven for 30 mins or deep fry, depending on choice.

Serve with chips and green veg.  Chips can be easily made by peeling and chopping a potato into chips and baking as above or deep frying.  Yum!

Let's try this again..............

Here is my attempt at a blog again.  My last try led to me posting a heap of recipes, only to find that my information was wrong.  So I tried again, and my daughter's medical condition changed and again, my recipes were wrong.  Since my last post 2 years ago, she has had so many diet changes that I have lost count, and none of them have been fun.  To add to the joy, she has been diagnosed with IBS, Fructose Malabsorption and multiple food allergies, and is currently on an elimination diet too.  She still has chronic eczema and has many digestive problems, is low in iron and spends a lot of her time in pain from bloating and abdominal distention.  Basically, she is a mess, but we love her anyway.

With my journey, many of my friends have suggested I document it here to share with other people who may be going through similar things, so here goes.

I won't bore you with all the ins and outs right now, bit by bit on future blogs will be enough whinging for anyone!  Needless to say, we are currently feeding her foods that avoid egg, dairy, soy, fruit (except apricots, lemons and limes and limited strawberries.  She is allergic to wheat, oats, nuts, tomato and mint, and can only eat leafy green veg, potatoes and limited carrots and butternut.

Here are my two favourite recipes for survival - Nomato Sauce and Coconut Rice Custard.  They are easy to make and are a staple food in this house.  I am planning to put up any interesting recipes that I cook, with links to where I got the recipes from.

NOMATO SAUCE

This is a great recipe as it is easy, and can be substituted for pasta sauce, pizza sauce or even for dipping your chips and nuggets in!  It DOES NOT taste like tomato sauce, because it isn't, but is nice and light as a substitute.

INGREDIENTS
1 small beet, peeled and diced
6 carrots, diced
1 leek, diced
1 1/2 cup water
herbs, spices to taste  (don't do too much flavouring as you can do that when you cook with it)

METHOD
Place all ingredients in a saucepan with a tight fitting lid.  Bring to the boil and simmer until veggies are soft.  Blend in a blender or food processor until fairly smooth.  It does not need to be completely smooth as it is a nice veggie sauce.  Use like you would any tomato sauce or paste.


See how easy that is?  It does tend to turn your bolognaise sauce pink, but otherwise is easy to use!

COCONUT RICE CUSTARD

Miss A (who is 6 yo) uses this as a breakfast cereal, to fill up as a dessert or we add some cocoa and freeze as an iceblock.

INGREDIENTS
1/4 cup arborio rice
400 ml coconut milk
200 ml rice milk or alternative of your choice
2 tbsp sugar

METHOD
Place all ingredients in a saucepan and bring up to the bowl.  Simmer for at least 20 mins, stirring often, until it has thickened to a custard consistency.